

GeoVision 360 – Manual
GeoVision 360 shows buildings, walls and roof slopes in 3D from surveys made with a Haglöf Geo or Geo 2, and calculates areas and volume for planar surfaces. The app runs in the web browser – survey files are never sent to a server.
1About GeoVision 360
The app works like Stockpile360 and reads the same files, but instead of stockpiles it calculates objects made of planar surfaces: buildings, single walls and inclined roof slopes.
- Base points (TYPE =
BASE) form the base of the object – the corners at ground level or at the eave. - Measurement points (all other points) describe the rest of the shape – wall tops, roof corners, ridge and points on the roof.
From these the app builds a 3D model and calculates footprint, perimeter, facade area per facade, roof planes with slope and facing, volume, heights and – for roof slopes – true surface area and slope.
2Getting started
- Open the app in a web browser (Chrome, Edge, Safari or Firefox). Choose the language with SV/EN at the top right.
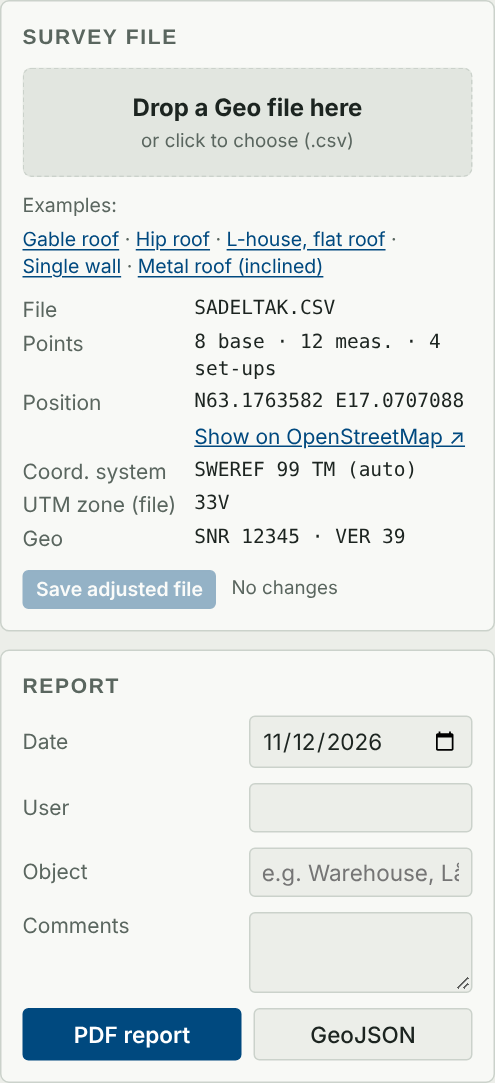
- Open a survey file: drag the Geo file (
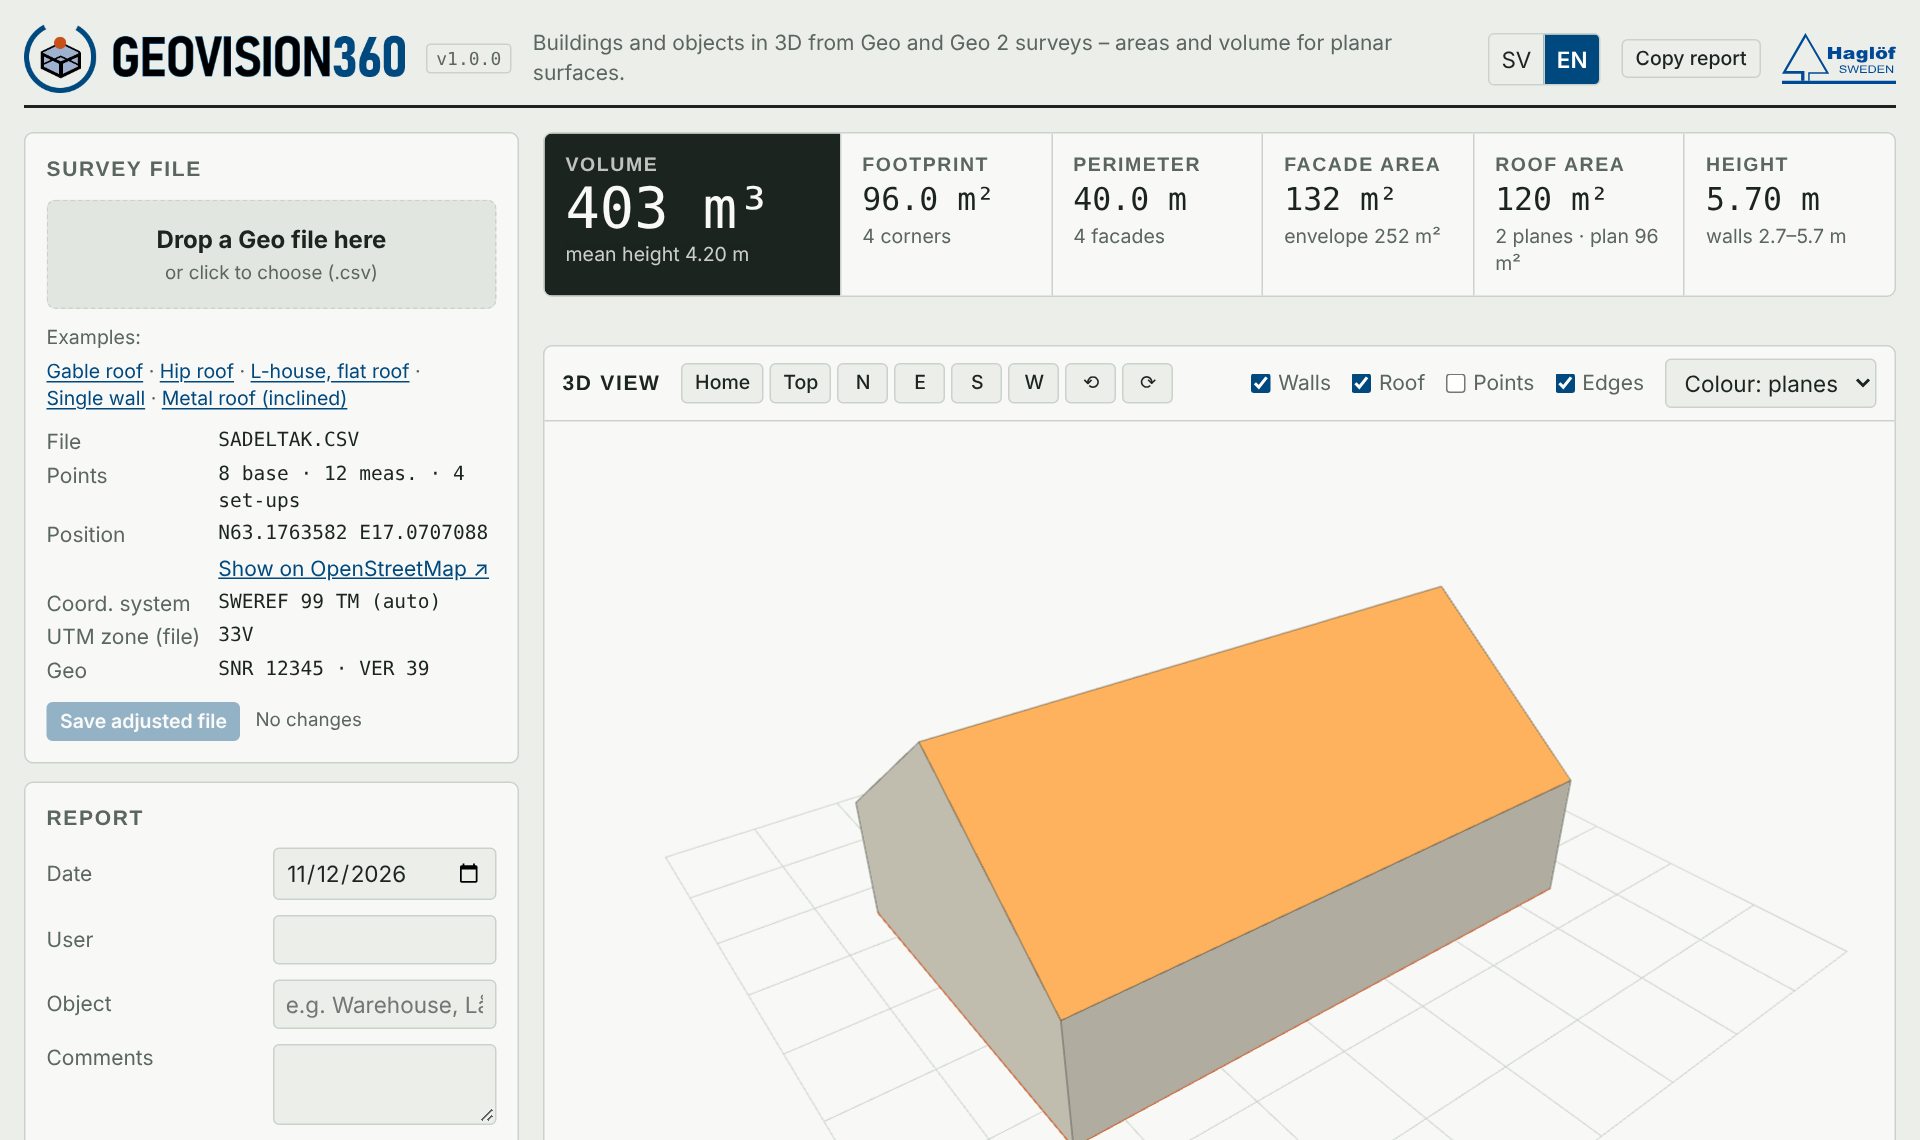
.csv) onto Drop a Geo file here, or click the box and choose the file. To just try it out, click one of the Examples. - Read the result in the result row at the top. Check the model in the 3D view, plan view and facade view.
- Correct if needed: click points to exclude them or change their type. Everything is recalculated at once.
- Fill in the report (date, user, object, comments) and create a PDF report or GeoJSON.
3Surveying in the field with Geo / Geo 2
Survey as usual with the Geo or Geo 2. The important thing is that the base is measured as base points (BASE) and everything else as ordinary measurement points. Measure the base in order around the object – the app builds the base in the order the points appear in the file.
Building
- Base points at every corner at ground level, in order around the house.
- Measurement points straight above the corners at the eave (wall top).
- Gable peaks and points on the roof (ridge, hip) if visible.
Single wall
- Two base points at the lower corners of the wall.
- Two measurement points at the top corners.
- More points along the top if the height varies.
Roof slope (inclined surface)
- Two base points along the eave (lower edge).
- Two measurement points at the upper edge (ridge or back edge).
- The app detects that the points lie behind the eave.
● = base point (BASE) ● = measurement point
Tips
- Measure corners from several set-ups if needed – the app fixes corners measured slightly differently from two sides.
- Preferably also measure a point straight above each base corner. If it is missing, the wall-top height is interpolated along the facade.
- Points on the roof (ridge, hip points) make the roof shape exact. Without them the app assumes planar surfaces between the facade tops.
- Several points on the same vertical are fine – the highest counts as the wall top, the lower ones become intermediate points.
4Object types
The app chooses the object type automatically. You can also choose it under Settings → Object type.
| Object type | Chosen automatically when | What is calculated |
|---|---|---|
| Building (closed base) | Three or more base points that enclose an area. | Volume, footprint, perimeter, facade area per facade, roof area per roof plane, heights. |
| Wall (vertical) | Two base points, or base points on an almost straight line, with the measurement points above the base line. | Wall area (one side), length, height min–max, mean height, facing. |
| Inclined surface (e.g. roof slope) | As a wall, but at least half of the measurement points lie clearly behind the base line. | True surface area, plan area, slope and fall direction, length of lower/upper edge, rise and depth. |
A measurement point counts as "behind" the base line when it lies far back compared with how high it is (more than 1 m and more than a quarter of its height). A wall has its top almost straight above its foot – a roof slope has its upper edge several metres back.
5Results
The result row at the top shows the main figures. The large dark box is the main result.
| Object type | Boxes |
|---|---|
| Building | Volume (with mean height) · Footprint (number of corners) · Perimeter (number of facades) · Facade area (envelope = facades + roof) · Roof area (number of planes and plan area) · Height (walls min–max) |
| Wall | Facade area (one side) · Length · Height · Mean height (area ÷ length) · Facing (towards the set-up) |
| Inclined surface | Surface (true) · Plan area (projected on the ground) · Slope (falls towards) · Length (lower and upper edge) · Rise (and depth) |
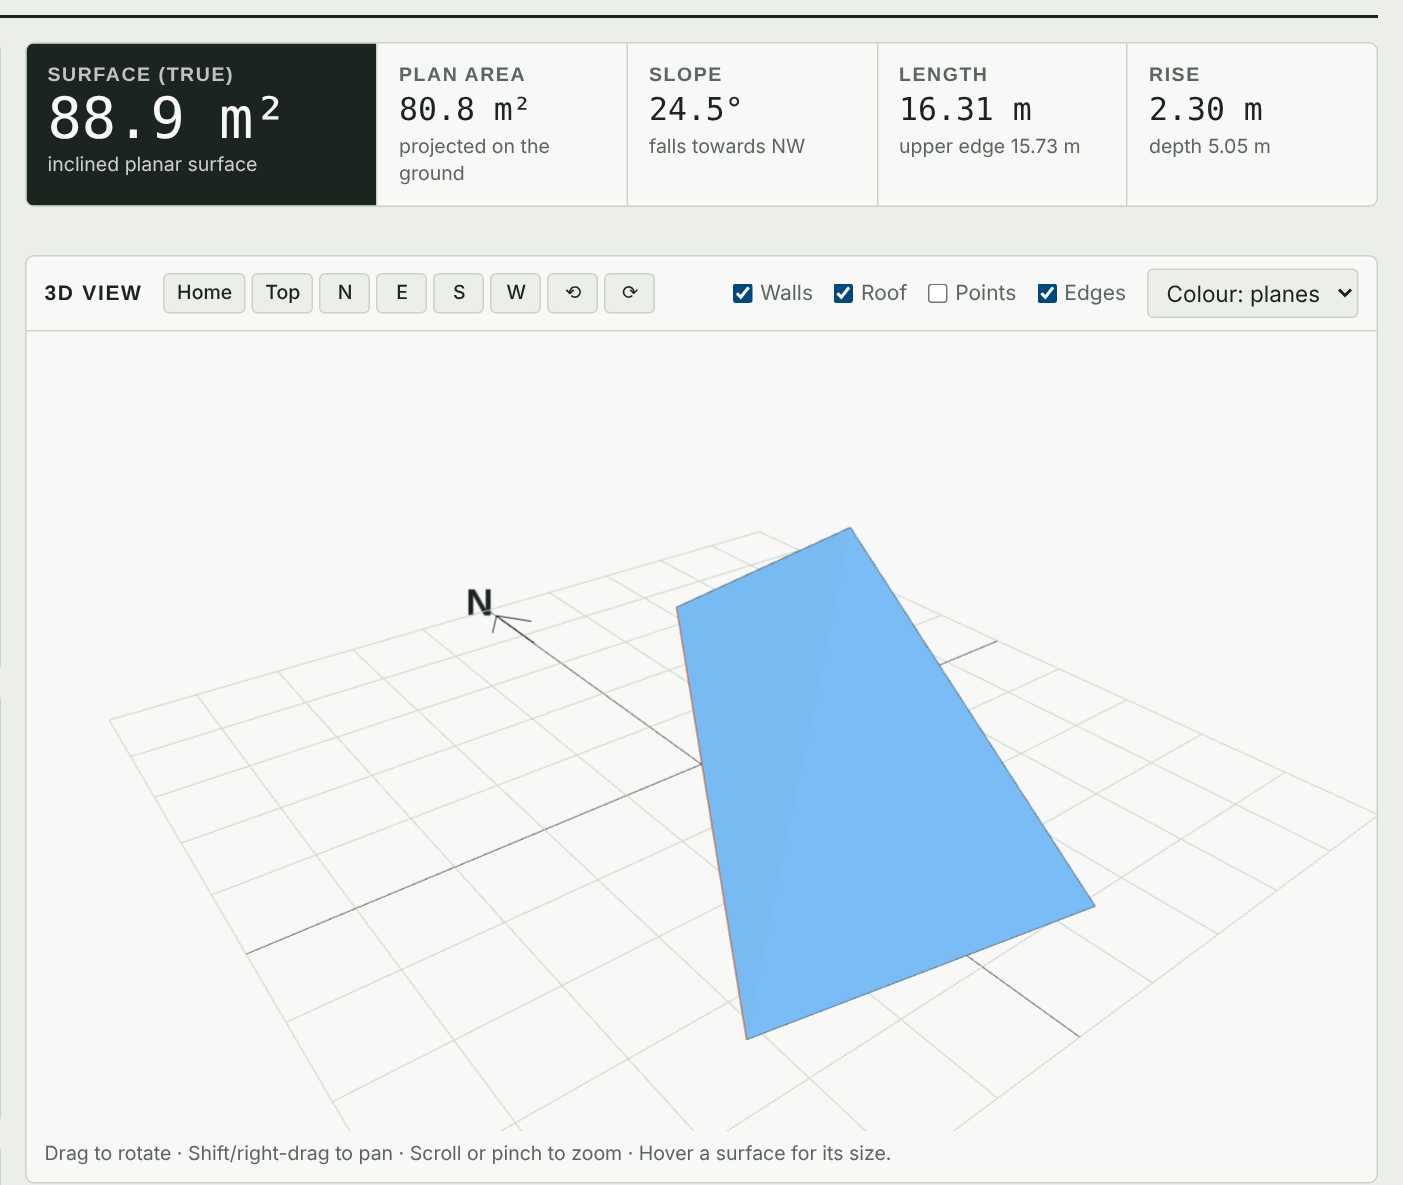

Switch between Metres and Feet under Settings – all values, tables and reports are converted.
63D view
| Do this | Result |
|---|---|
| Drag with the mouse / one finger | Rotates the model |
| Shift + drag, or drag with the right mouse button | Pans |
| Scroll / pinch with two fingers | Zooms |
| Hover over a surface | Shows the facade or roof plane number, area, slope and height |
| Home · Top · N E S W · ⟲ ⟳ | Start view, from above, from a direction, turn 45° |
The check boxes Walls, Roof, Points and Edges show and hide parts of the model. With Colour you colour the roof by planes, height or slope. The orange line is the base.
7Plan view
The plan view shows the object from above with north up. The base is orange, the roof planes are coloured and numbered R1, R2 …, the facades numbered F1, F2 …. Fixed corners are shown with a blue ring and the set-ups (instrument positions) with triangles.
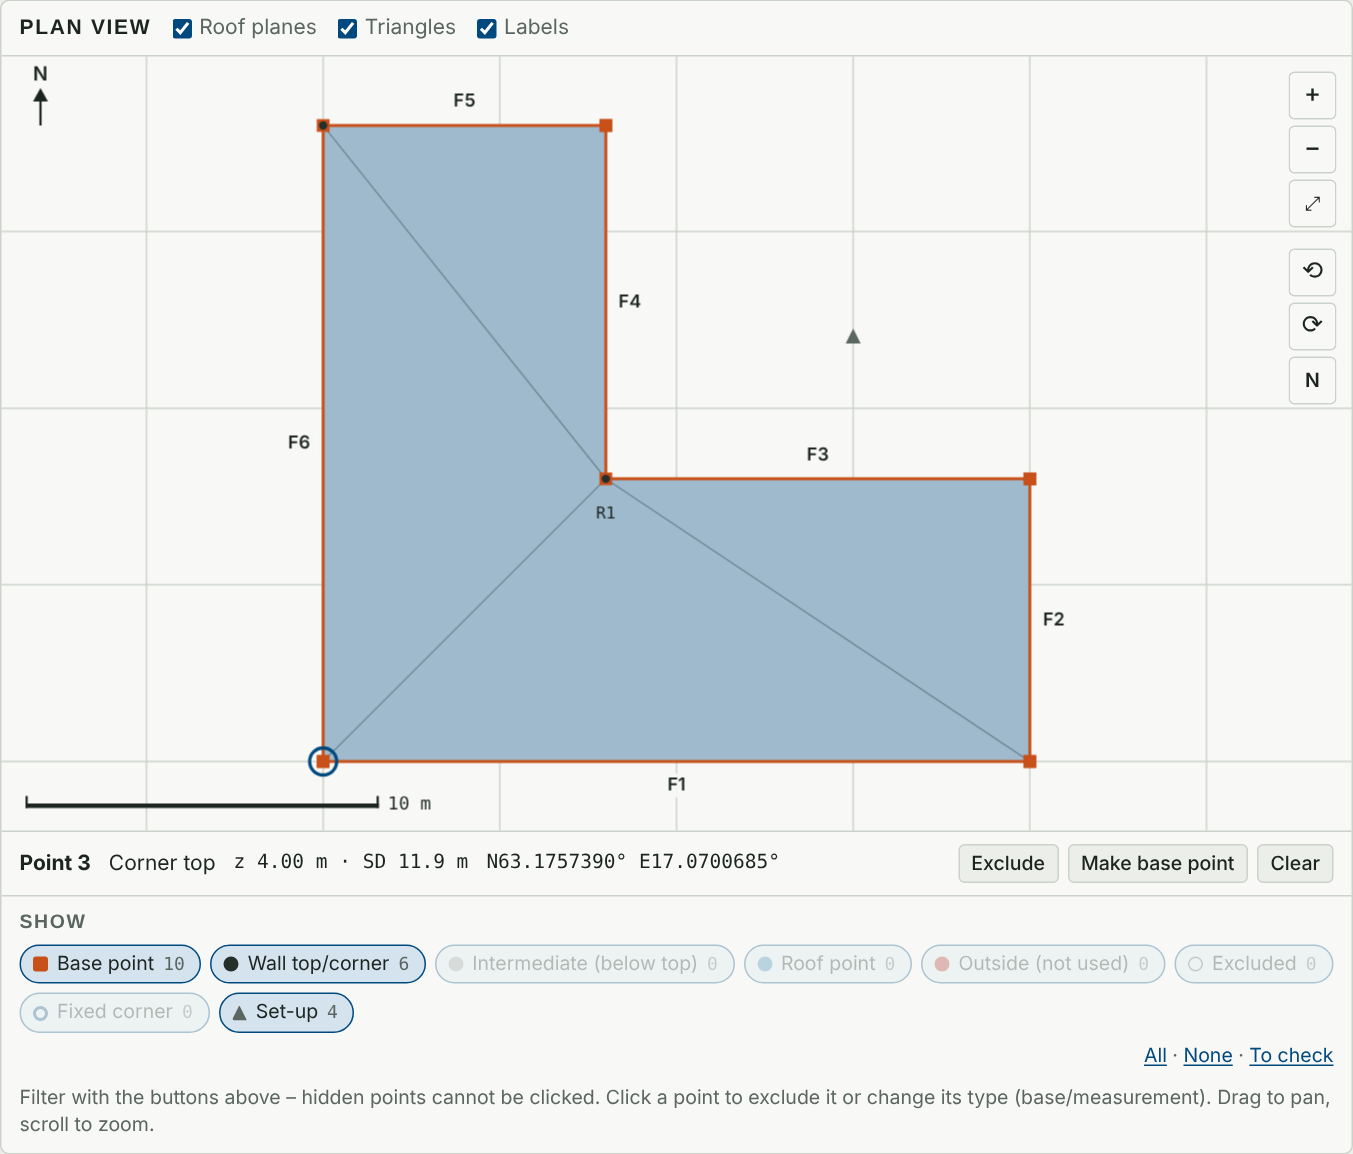
- Pan: drag. Zoom: scroll, pinch or + / −. ⤢ fits the view.
- Rotate: ⟲ / ⟳ turn 15°, N resets north up.
- Layers: Roof planes, Triangles (the roof triangulation) and Labels.
- A scale bar is shown at the bottom left.
8Editing points
Selecting and changing a point
Click a point in the plan view or the facade view. A box shows the point number, type, height (z), distance (SD) and position in WGS 84, and the buttons:
- Exclude / Include – removes the point from the calculation, or brings it back.
- Make base point / Make measurement point – changes the point type.
- Clear.
Everything is recalculated at once. The selected point is marked in both the plan view and the facade view.
Filtering point types
The Show row below the plan view has one button per point type, with a count. Hidden points are not drawn and cannot be clicked – which makes it easy to hit the right point where points are close together. The filter applies to the plan view, the facade view and the points in 3D.
| Type | Meaning |
|---|---|
| ■ Base point | BASE point that is part of the base. Hollow square = base point fixed away. |
| ● Wall top/corner | Measurement point used as wall top, corner top or upper edge of a roof slope. |
| ● Intermediate (below top) | Lower point on the same vertical as a wall top – not used. |
| ● Roof point | Point on the roof (ridge, hip) – used for the roof shape. |
| ✕ Outside | Lies outside the base and too far from the walls – not used. |
| ○ Excluded | Point you have excluded. |
| ◯ Fixed corner | Corner that the app fixed automatically. |
| ▲ Set-up | Instrument position (1P_REL). |
Click shows/hides a type. Double-click shows only that type. Quick choices: All, None and To check (base points, outside points, excluded points and fixed corners). The choice is remembered.
Saving the changes to a file
When you have changed points, Save adjusted file appears in the Survey file panel. It saves a new Geo file (…_adjusted.csv) with the excluded points removed and the point types changed. The original file is never changed.
9Facade view (unrolled)
The facade view shows all facades in order around the object, as if the walls were unfolded. The orange line is the base, the black line the wall top. Dashed lines separate the facades and each facade is labelled with its number and facing.
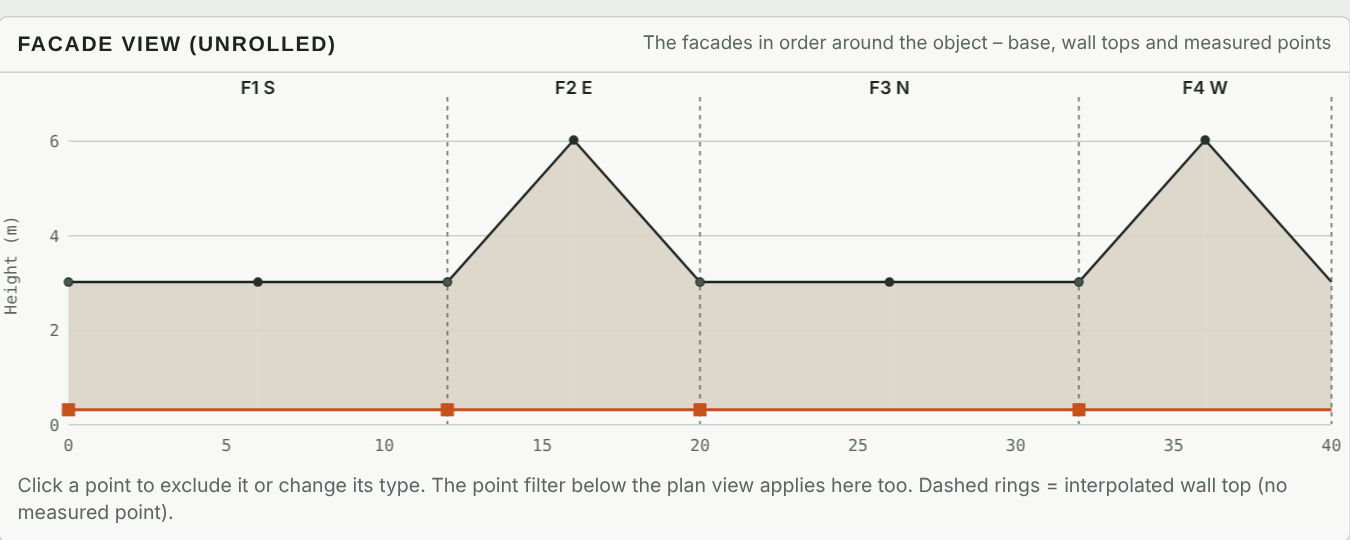
- Hover over a point for number, type and height – or between points for facade, distance and height.
- Click a point to exclude it or change its type, just as in the plan view.
- Dashed rings show where the wall top has no measured point and is therefore interpolated.
For a roof slope the view shows the rise between the lower and upper edge along the eave.
10Tables
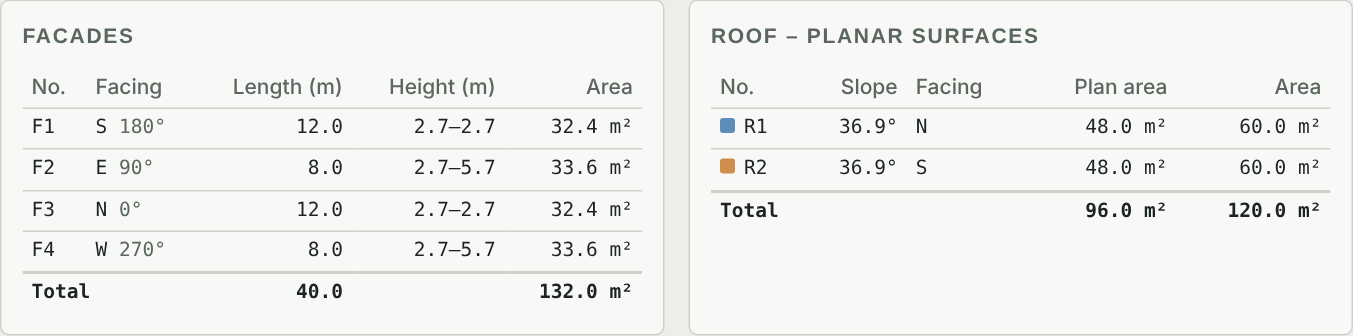
- Facades: number, facing (compass direction and degrees), length, height min–max and area. Hover over a row to highlight the facade in the plan view, facade view and 3D; click to keep the highlight.
- Roof – planar surfaces (for roof slopes: Inclined surface): number, slope, fall direction, plan area and true area.
- Roof model comparison (building): volume with planar roof surfaces (used), with a flat roof at the mean wall-top height and with a flat roof at the highest height. Shows the range when the roof itself has not been measured.
11Settings
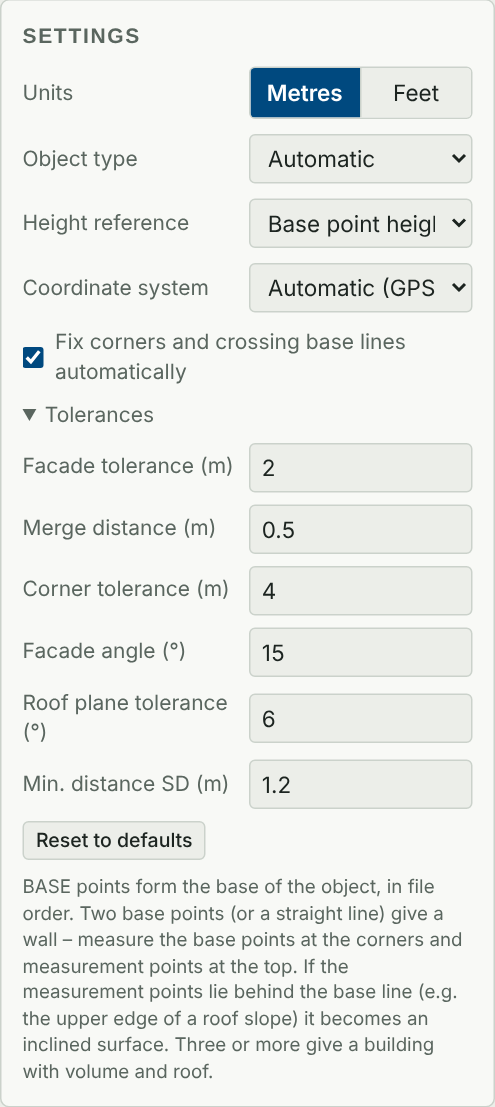
| Setting | Description |
|---|---|
| Units | Metres or feet. |
| Object type | Automatic, Building, Wall (vertical) or Inclined surface. See Object types. |
| Height reference | Base point heights (default – the floor follows the measured base points), Fitted ground plane (a plane through the base points) or Horizontal (mean). |
| Coordinate system | Used for the map, OpenStreetMap and GeoJSON. See Coordinate systems. |
| Fix corners and crossing base lines automatically | Fixes corners measured differently from two set-ups and base lines that cross each other. |
Tolerances
| Tolerance | Default | Meaning |
|---|---|---|
| Facade tolerance | 2 m | How far from a wall a measurement point may lie to count as a wall top. |
| Merge distance | 0.5 m | Base points closer than this are merged. Points on the same vertical within this distance count as the same place. |
| Corner tolerance | 4 m | Longest "wrong" short edge at a corner that is fixed automatically. |
| Facade angle | 15° | Wall parts with a smaller difference in direction count as the same facade. |
| Roof plane tolerance | 6° | Roof triangles with a smaller difference in angle are merged into one planar surface. |
| Min. distance SD | 1.2 m | Points with a shorter measuring distance are filtered out (as in Stockpile360). |
Reset to defaults restores the tolerances. Settings are saved in the browser.
12Coordinate systems
The calculation of areas and volume does not depend on the coordinate system. It is only used to place the object on the map (OpenStreetMap, GeoJSON and the WGS 84 position of points).
- Automatic (default): the app tries national systems, the file's
UTM ZONEcolumn and nearby UTM zones, and picks the one where the instrument GPS position lands closest to the measured points. If none fits, WGS 84 from the file is used. - WGS 84 – lat/lon of each point in the file: every Geo point carries its own latitude and longitude. Works anywhere in the world. The app shows how well X/Y and lat/lon agree (normally a few centimetres).
- Whole world: WGS 84 / UTM zones 1–60, north and south.
- National systems: Sweden (SWEREF 99 TM and local zones), Norway (UTM, NTM), Finland (TM35FIN, GK), Denmark (DKTM), rest of Europe (ETRS89 UTM, Poland, Lithuania, Latvia, Ireland, Portugal, Croatia, Slovenia), New Zealand, Australia (MGA) and Japan.
- Custom Transverse Mercator: enter central meridian, latitude of origin, scale factor and false easting/northing. The button Fill in the UTM zone from the GPS position gives a starting point.
- Local at the GPS position: approximate fallback.
If the GPS position lands more than 3 km from the measured points with the chosen system, a red warning is shown in the Survey file panel. Choose another coordinate system – or WGS 84.
13Warnings
| Warning | What you can do |
|---|---|
| Corners were fixed automatically | Check the blue rings in the plan view. Turn off automatic fixing if the result is wrong. |
| Sharp angle at base point | A base point forms a narrow spike – often a point that does not belong to the object. Exclude it if it is wrong. |
| Measurement points lie outside the base | The points are not used. Check their type, or increase the facade tolerance. |
| No wall top – interpolated | The wall-top height was calculated along the facade. Measure a point above the corner for an exact height. |
| Measurement points lie behind the base line | You chose Wall but the points look like a roof slope – choose Inclined surface. |
| A wall top is below the base | Probably a wrong point type – check the BASE points. |
| Points with short SD were filtered out | Lower Min. distance SD if the points should be included. |
14Report and export
- PDF report: report details, results, 3D image, plan view, facade view, tables, comparison, settings and a clickable link to OpenStreetMap.
- GeoJSON: the base, the facade tops, the roof planes (3D) and all points in WGS 84 with calculated values as properties. Opens in QGIS, ArcGIS, Google Earth (after conversion) and more.
- Copy report (top right): copies a text report to paste into an e-mail or document.
- Show on OpenStreetMap: opens the object position on openstreetmap.org.
- Save adjusted file: see Editing points.
The report fields (date, user, object, comments) are saved in the browser for next time.
15File format
The app reads CSV files from Haglöf Geo and Geo 2 (semicolon-separated, the same format as Stockpile360). Columns used:
| Column | Use |
|---|---|
MARK | $ = measurement point, & = set-up (1P_REL), # = settings row |
TYPE | BASE = base point, anything else = measurement point |
X(m), Y(m), Z(m) | North, east and height. Feet (X(ft) …) are converted. Without X/Y, LAT/LON are used. |
LAT, N/S, LON, E/W | Point position in WGS 84 |
H, ALTITUDE | Height if Z is missing |
SD | Measuring distance – for filtering |
UTM ZONE | Helps the automatic coordinate system detection |
SEQ, ID, SNR, VER, UNIT | Point number, object ID, instrument serial number and version, unit |
16How the app calculates
Building
- The base points form a closed footprint polygon in file order. Points closer than the merge distance are merged.
- Short, back-tracking edges at corners (two set-ups that measured the same corner differently) are replaced by the intersection of the facade lines. Crossing base lines are trimmed.
- Measurement points near a wall become wall tops (projected onto the wall). The highest point on a vertical counts. Points inside the base become roof points.
- No wall top at a corner → the height is interpolated along the facade.
- The roof is triangulated between the wall tops and roof points so that the triangles form surfaces as planar as possible; triangles with almost the same slope are merged into one roof plane.
- Volume = the sum of each triangle's plan area × its mean height above the base. Facade area = wall segment length × mean height.
Wall
The base points form an open line. Wall area = the sum of segment length × mean height (one side). The facing is given towards the side where the instrument stood.
Inclined surface
The surface is triangulated between the lower edge (base points) and the upper edge (measurement points). True area is the area in 3D, plan area the area projected on the ground, and the slope is calculated from rise and depth.
The results are an estimate from measured points. The accuracy depends on the survey – always check the base and the point types.
17FAQ
My roof slope is shown as a wall.
Choose Object type → Inclined surface. In Automatic mode it counts as a roof slope when at least half of the measurement points lie clearly behind the eave.
The roof looks strange.
Without points on the roof itself, the app assumes planar surfaces between the facade tops. Measure ridge and hip points, or compare the volumes in the Roof model comparison table.
Part of the building is missing or sticks out.
Check that the base points were measured in order around the building. Use the To check filter and exclude wrong base points.
The object ends up in the wrong place on the map.
Choose another coordinate system, or WGS 84 – lat/lon of each point in the file.
The PDF or GeoJSON file is not saved.
Check that the browser allows downloads from the page. The page must be opened via http:// or https://.
Are my surveys sent anywhere?
No. The files are read and calculated in your browser. Only the 3D and PDF libraries and the fonts are loaded from the internet.